
About the rCell 300
The MultiTech rCell 300 router is both an industrial router and a specialized network device designed to connect internet-of-things (IoT) devices. The rCell 300 provides enhanced security to protect against cyber threats, includes edge intelligence to run local applications, and offers secure data communication between many types of devices that use legacy or the latest communication technologies. The rCell 300 can be remotely managed via MT Cloud Device Manager. For additional information, see the rCell 300 Series Router Hardware Guide or the rCell 300 Configuration Guide.
In the Box
Some options don't include all of the items shown below. See rCell 300 Ordering Options.
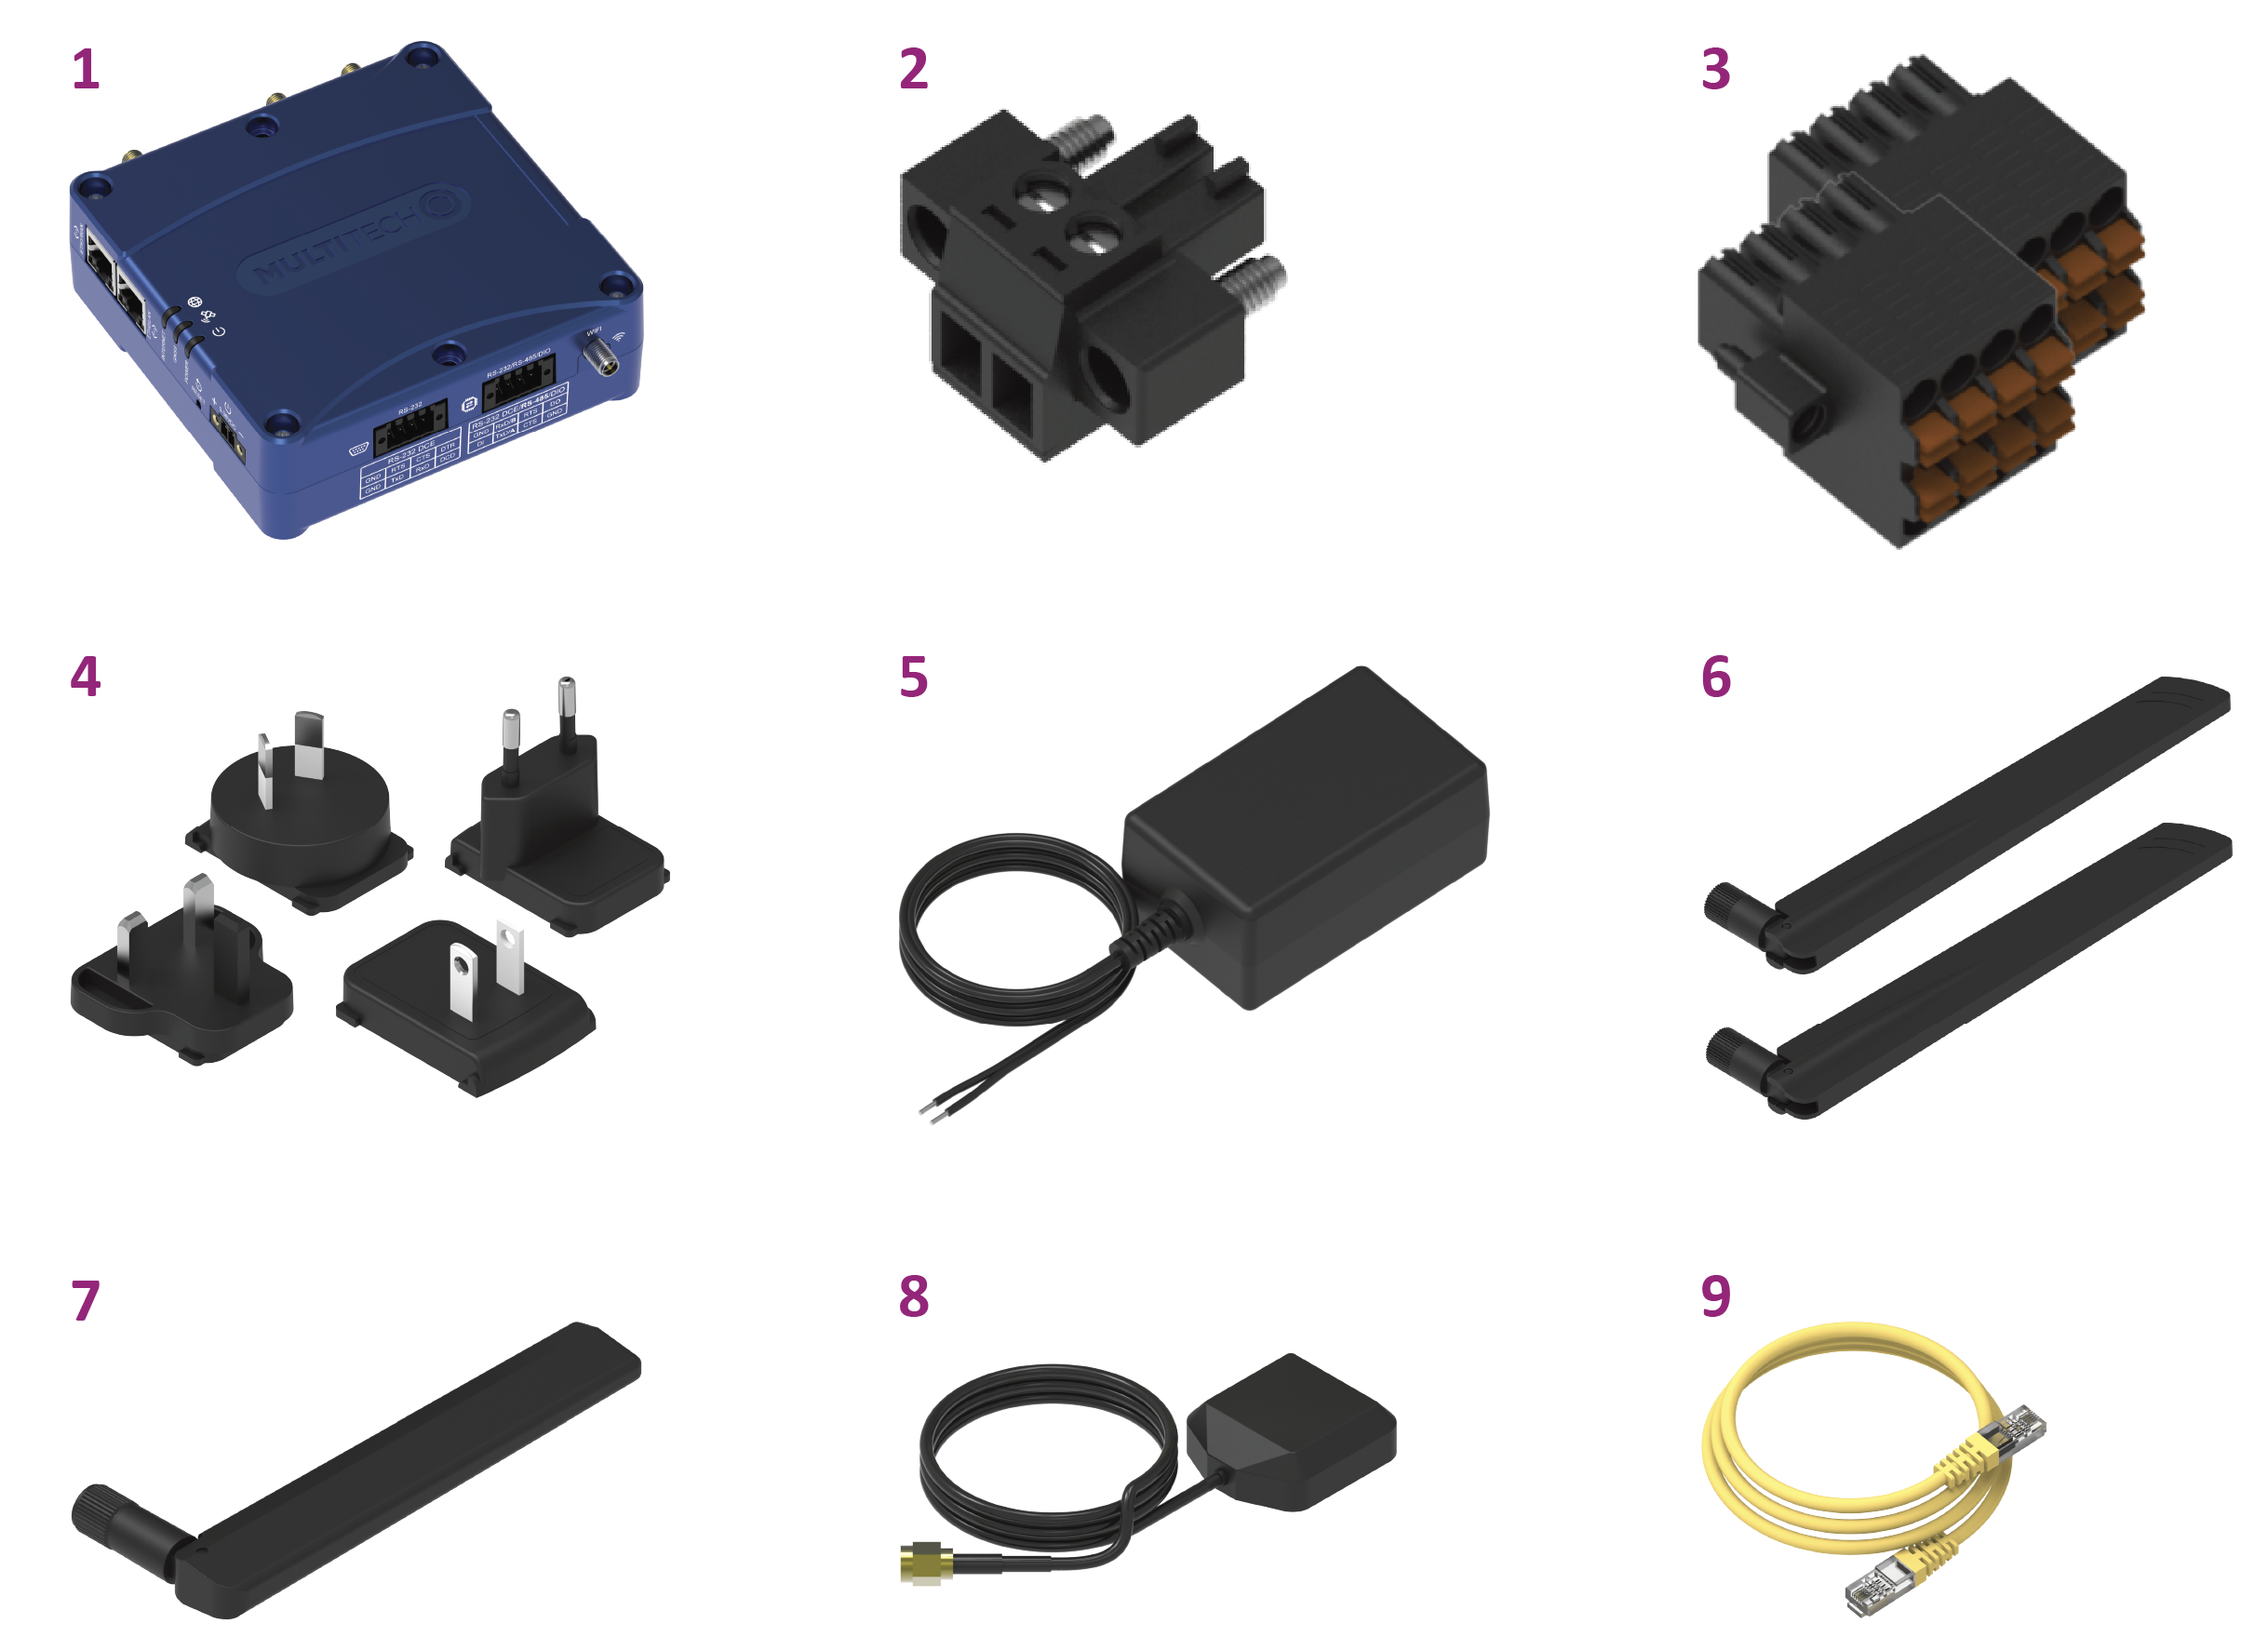
| Item | Description | Quantity |
|---|---|---|
| 1 | rCell 300 LTE Cat 4 cellular router with fallback | 1 |
| 2 | 2-wire terminal block (power) | 1 |
| 3 | 8-wire terminal block (serial, GPIO) | 2 |
| 4 | AU/NZ, EU, GB, US power blade set | 1 |
| 5 | Power supply with stripped wires | 1 |
| 6 | Cellular (LTE) antenna | 2 |
| 7 | Wi-Fi antenna (Option based on configuration) | 1 |
| 8 | GPS antenna | 1 |
| 9 | Ethernet CAT5e cable, 6 ft | 1 |
| 10 | Quick-start card (not shown) | 1 |
| 11 | Registration card (not shown) | 1 |
rCell 300 Ordering Options
| Ordering Part Number | In the Box Items Included | Region |
|---|---|---|
| MTR3‑L4G2D‑AC00PA‑EWM | All items (with Wi-Fi) |
Australia Canada European Union United Kingdom United States |
| MTR3‑L4G2D‑AC00QA‑EWM | All items except 7 (without Wi-Fi) | |
| MTR3‑L4G2D‑AC00PA‑11M | Only items 1, 2, 3, 10, and 11 (with Wi-Fi) | |
| MTR3‑L4G2D‑AC00QA‑11M | Only items 1, 2, 3, 10, and 11 (without Wi-Fi) |
Required Tools
The following tools are only required if mounting the device:
- Four #6 (3.5mm) screws with anchors (not provided)
- Screwdriver
- Drill
Install the Device
-
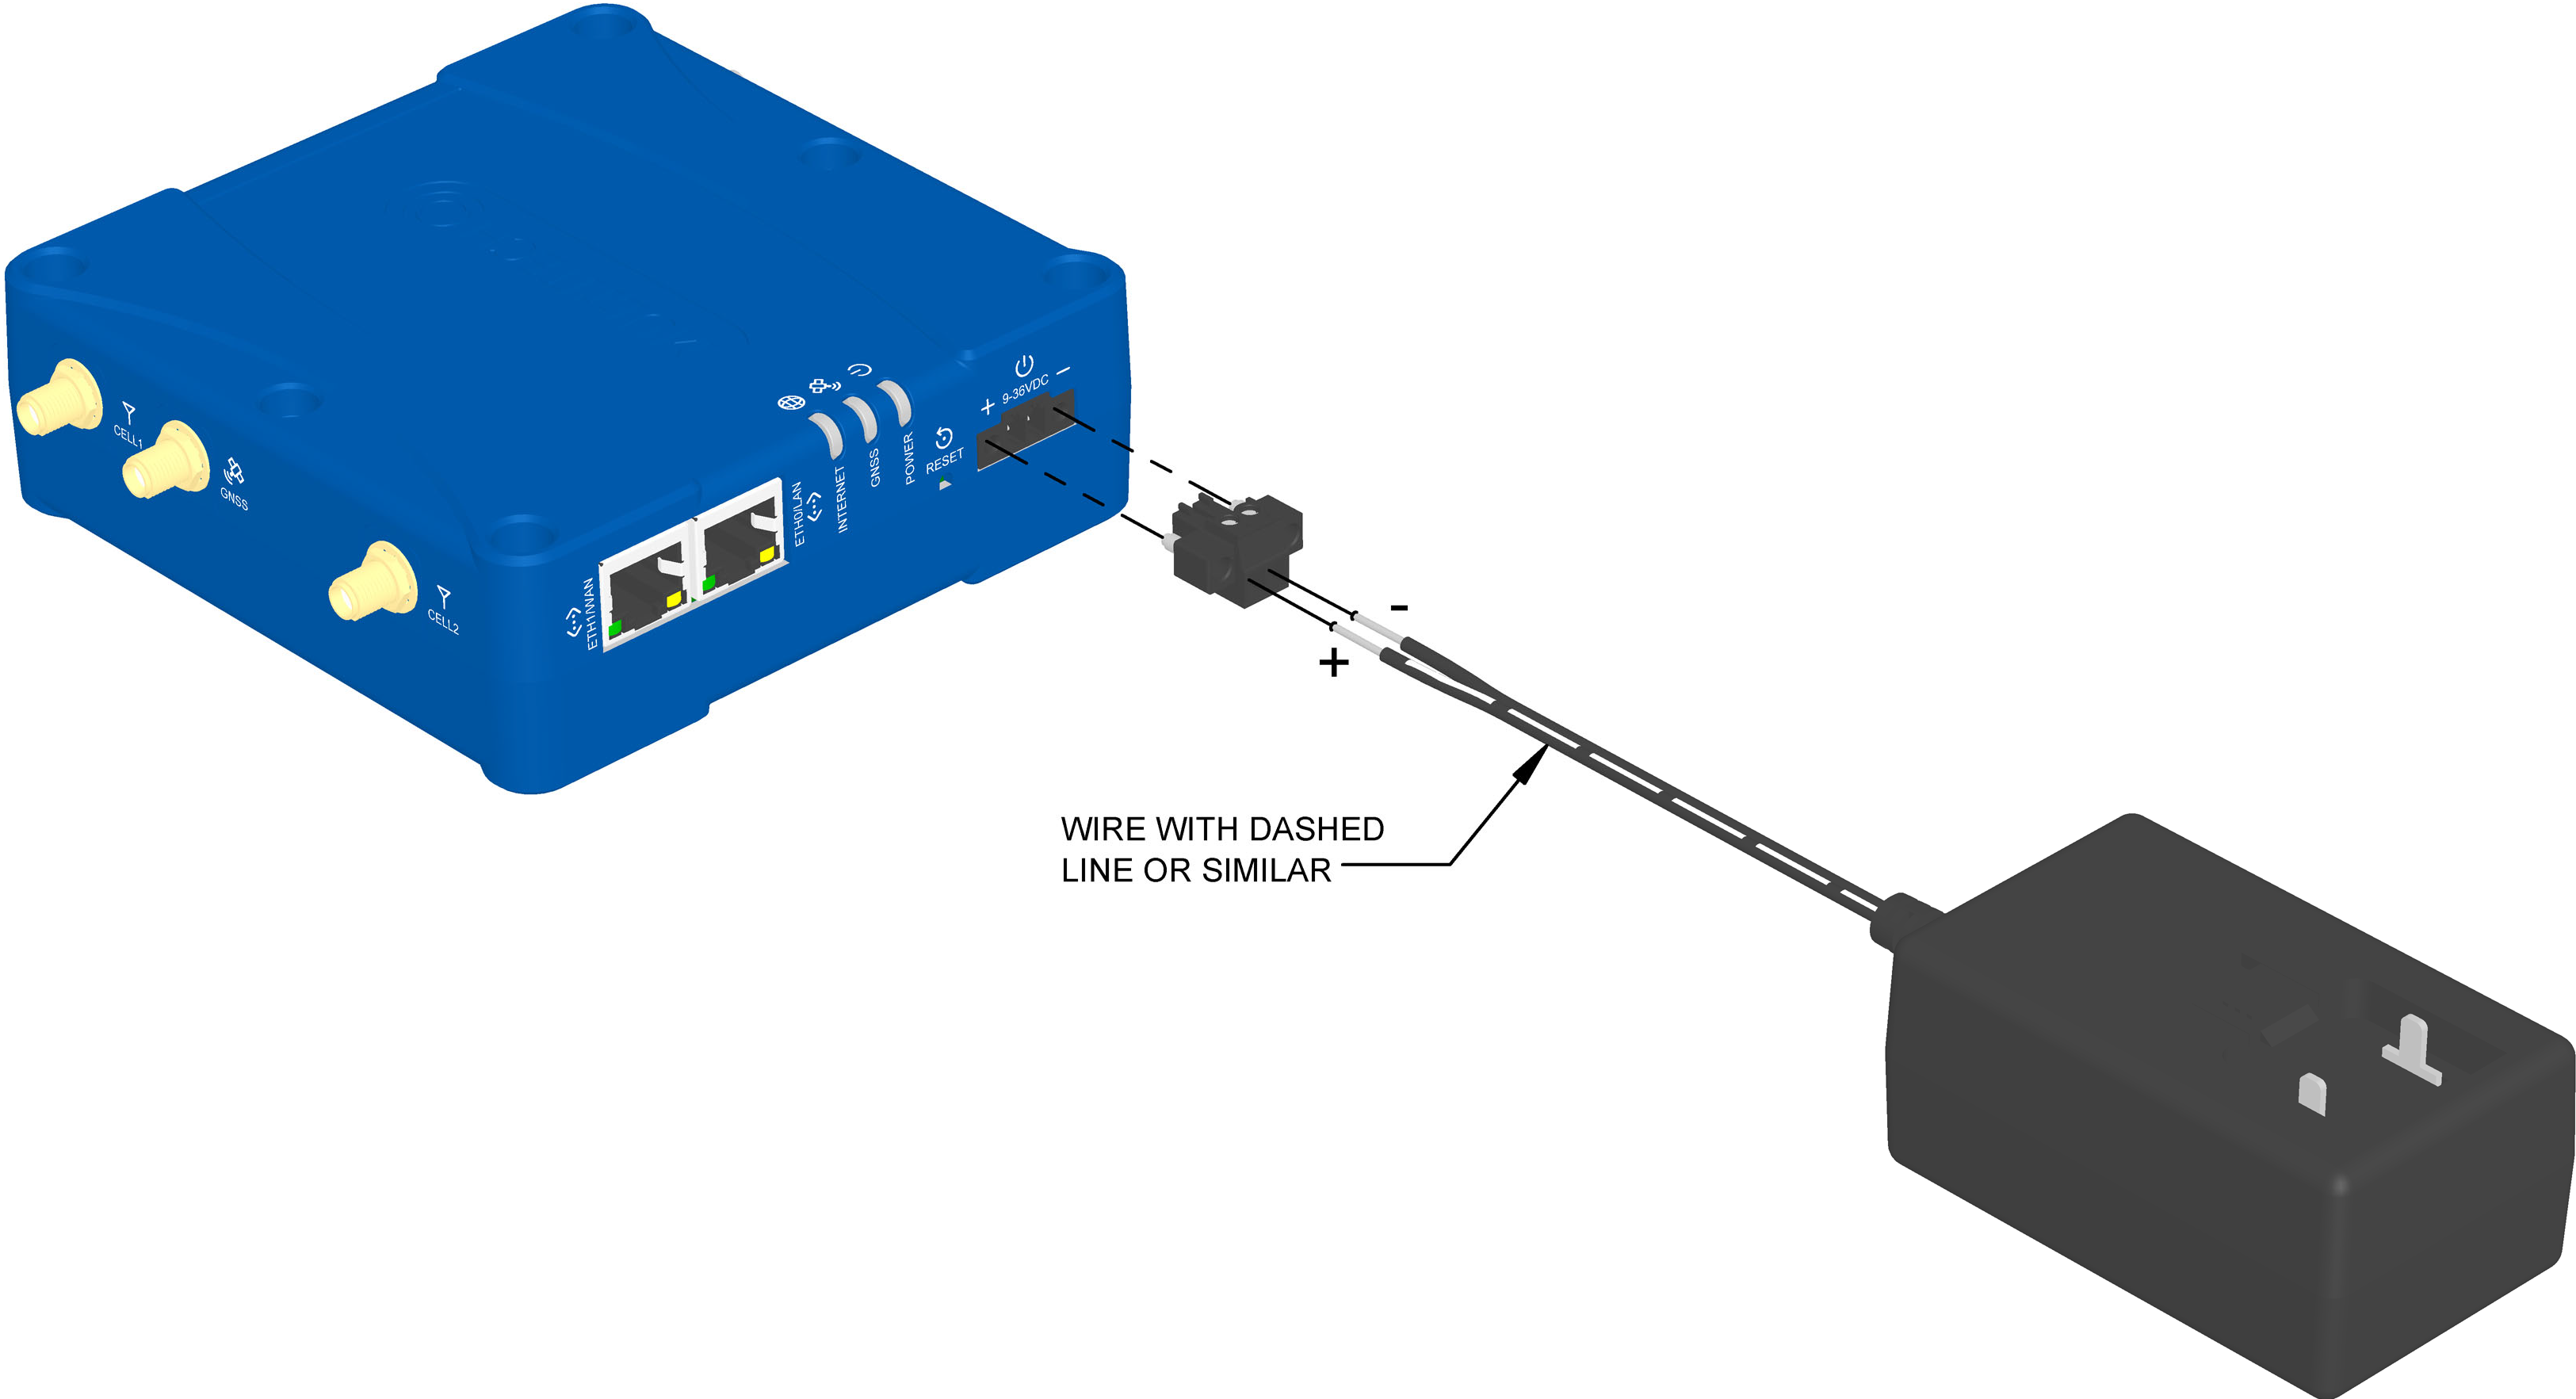
Connect the power supply:
- Using a 2.0 mm slotted screwdriver, screw the power supply wires into the 2-wire terminal plug.
- Secure the 2-wire terminal plug to the 9–36 VDC 2-pin terminal block on the device using a 2.5 mm slotted screwdriver.
- Connect the power supply to a power source. The POWER LED turns solid green when the device is ready for use.
The proper polarity is shown below.
Note: The customer should take steps to prevent any potential reverse polarity connections.
Commissioning Mode
The rCell 300 ships in what is called Commissioning Mode. As soon as the rCell 300 is reset to factory defaults or right after the manufacturing process is complete, the system is in Commissioning Mode.
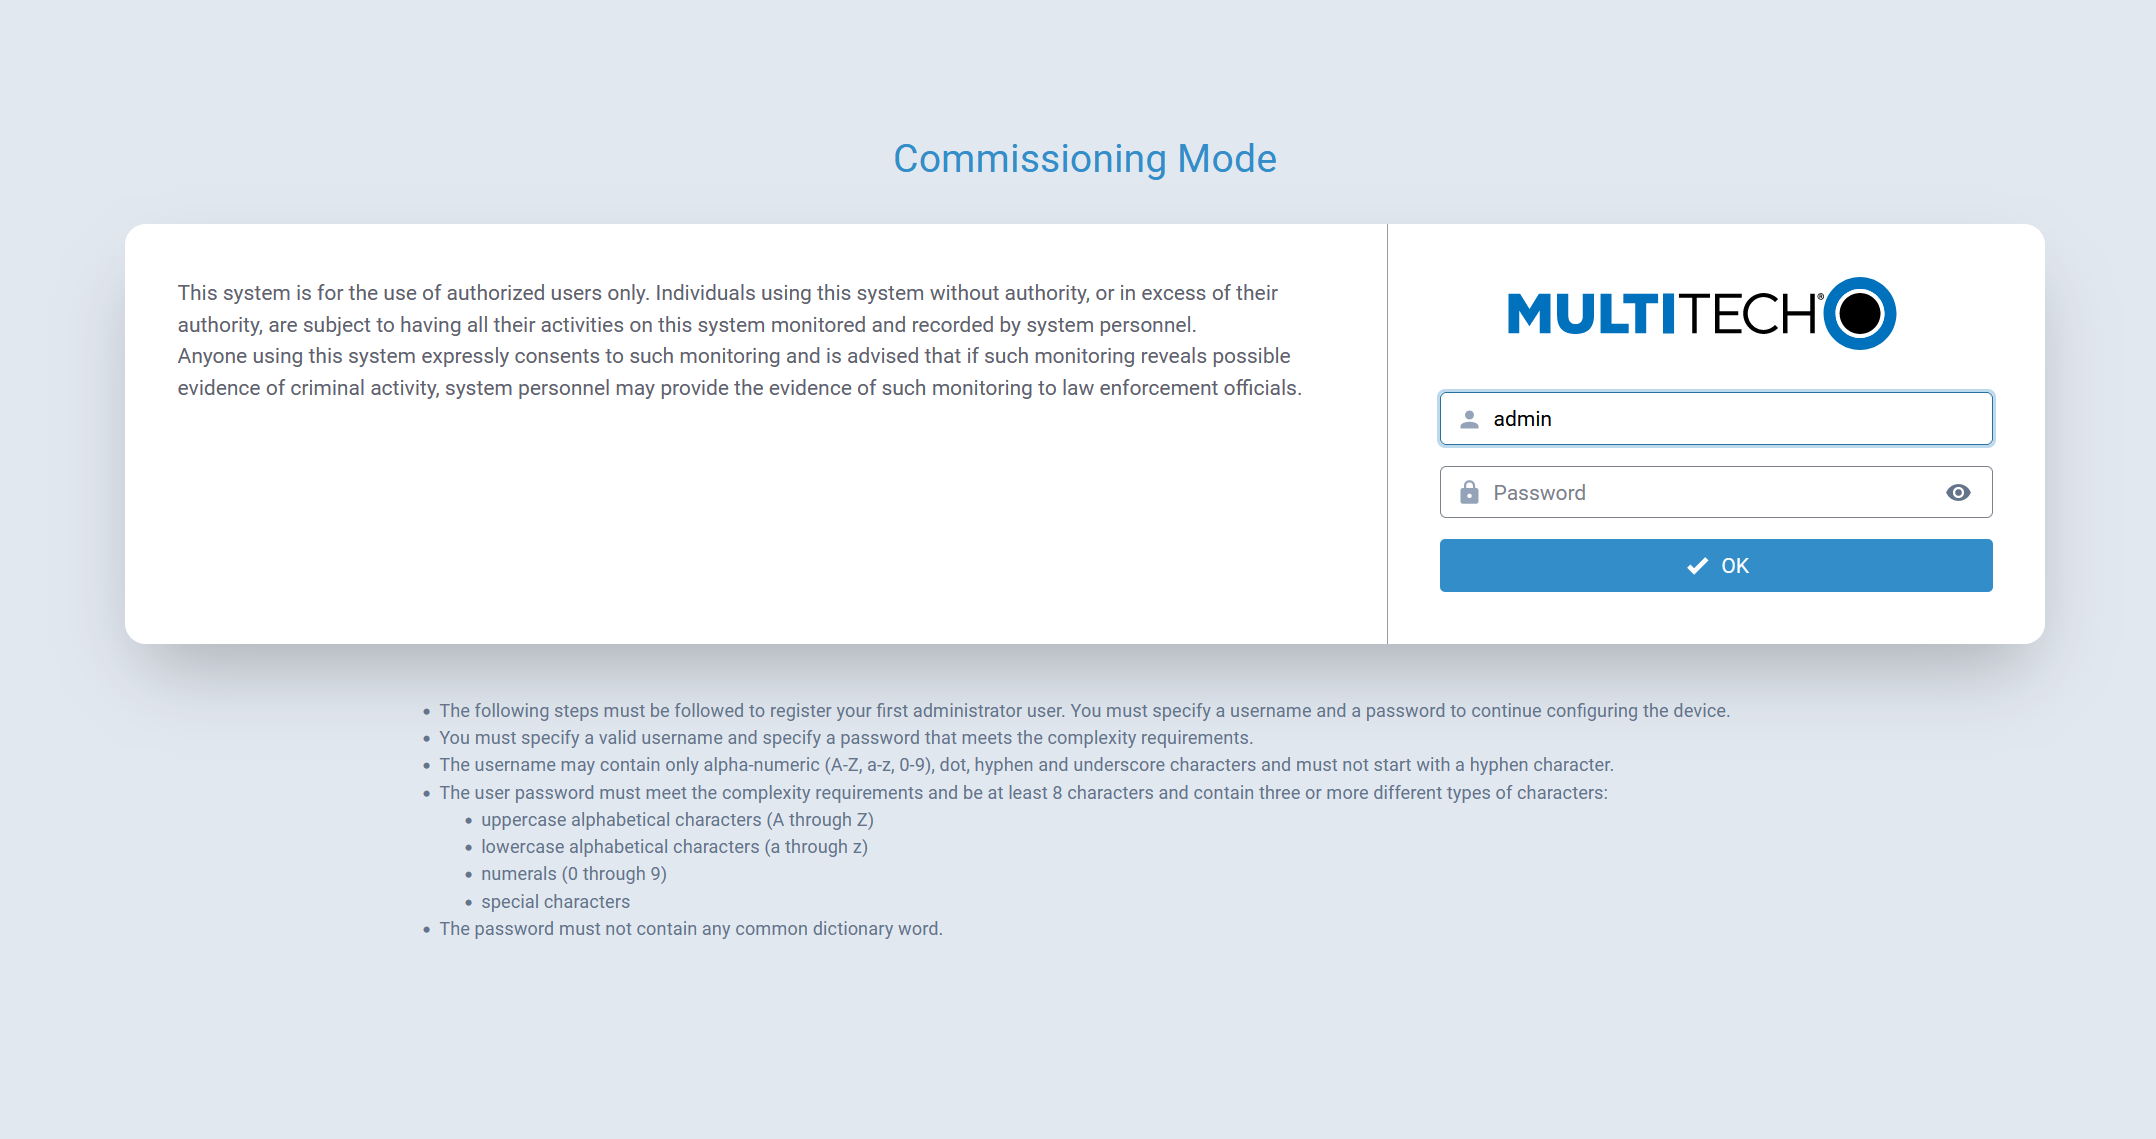
In this mode, the ETH1 /WAN is configured as a WAN DHCP Client. Using ZeroTouch functionality, the system automatically attempts to connect to MT Cloud Device Manager as soon as there is an internet connection. For the first 10 minutes, the device check-in interval is every 3 minutes. After this initial period, the device resumed normal operation and uses the configured check-in interval.
The ETH0/LAN interface is configured with an IP of 192.168.2.1 and a netmask of 255.255.255.0.
Before proceeding, an Administrative User must be configured.
Configure the Administrative User
Perform the following procedure to create and configure the Administrative User:
Password Requirements Overview
- During Commissioning Mode, the minimum password length is 8 characters.
- After commissioning is complete and an Administrative User is created:
- The minimum password length for all new users is 15 characters.
- The minimum password length for any password change, including changes to the Administrative User’s own password, is 15 characters.
Note: These requirements align with NIST SP 800-63B guidance for single-factor authentication. - The minimum password length can be viewed or modified on the Password Complexity Rules configuration page.
- Devices upgraded from a previous release retain their existing password rules until the password complexity rules are manually changed.
Procedure
- Open a browser and enter the default IP address in the URL field,
192.168.2.1. Most browsers display a warning about HTTP addresses
being unsafe because of a self-signed certificate:
- For Edge, click Advanced and then Continue to 192.168.2.1.
- For Firefox, click Advanced and then click Accept the Risk and Continue.
- For Chrome, click Advanced and then Continue to 192.168.2.1 (unsafe).
- Enter a username for the Administrative User. Click OK. Follow on-screen instructions for usernames.
- Enter a password and click OK. Follow on screen instructions for a secure password.
- Enter the password again to confirm. Click OK.
- Log in to the rCell 300 using the new username and password.
The First-Time Setup Wizard launches.
First Time Setup Wizard
- Operating mode (e.g., Network Router, Cellular IP Passthrough)
- System date and time
- Cellular connectivity
Select Mode
An rCell 300 can be configured to operate in the following modes:
- Network Router
- Cellular IP Passthrough
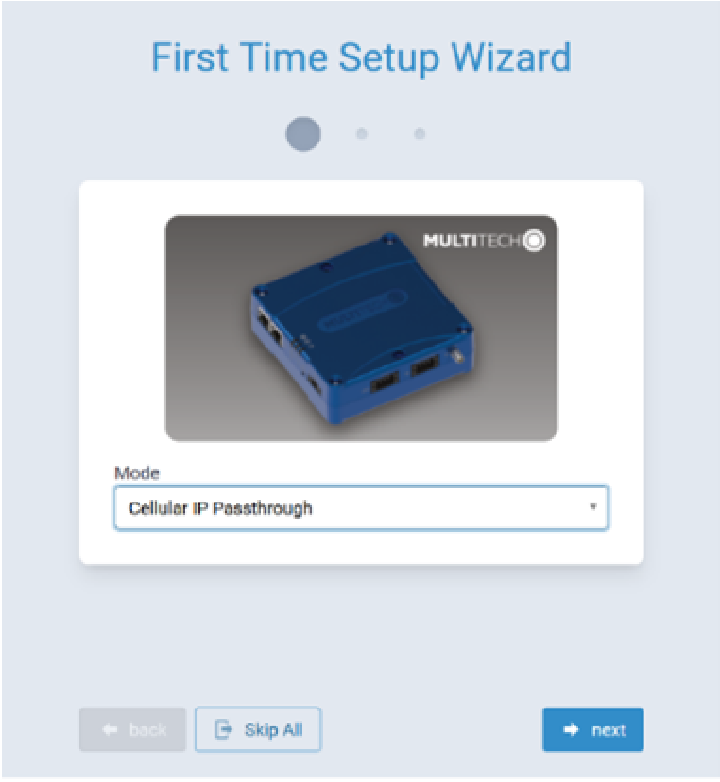
From the pull-down list, select the desired Mode in which the rCell 300 is to operate.
Click next.
Time Configuration
Configure Date & Time and Time Zone to reflect the rCell 300's location.
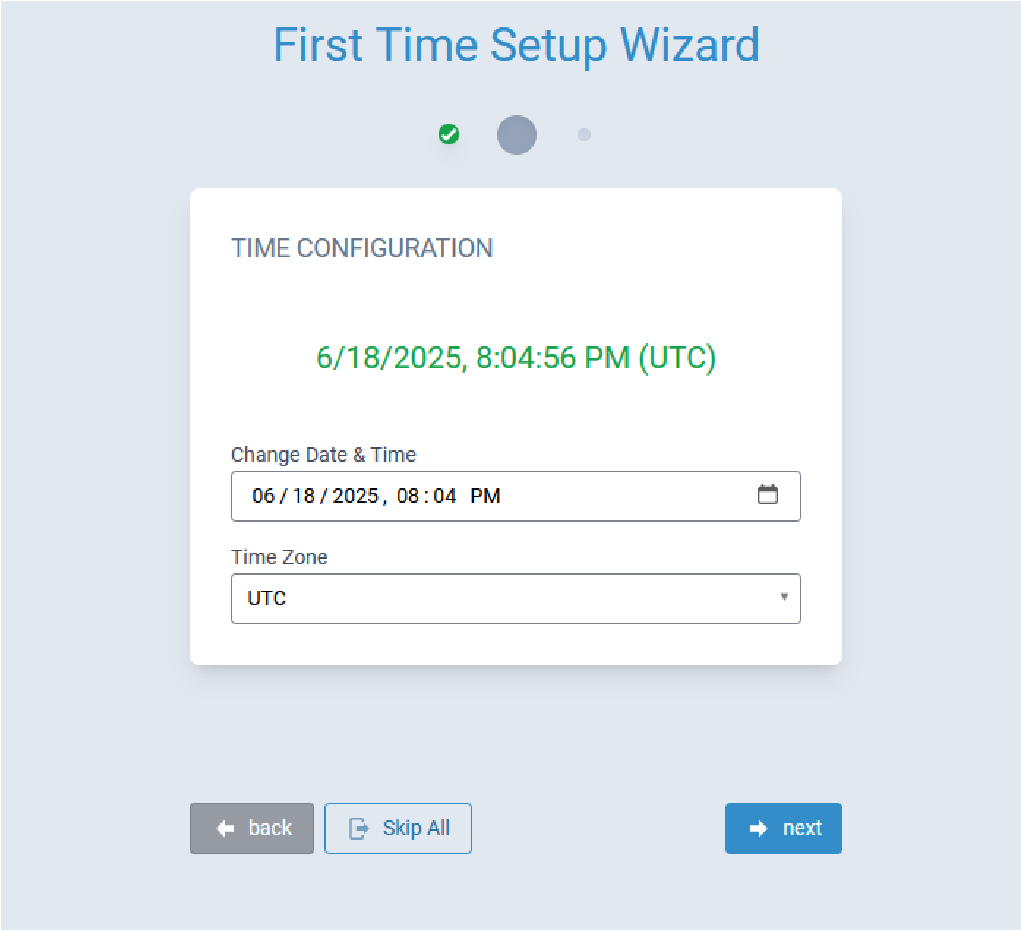
Click Next.
Cellular Configuration
Available options for cellular configuration depend upon whether a SIM card has been installed in the rCell 300.
- For configuration information when a SIM card is present/has been detected, refer to SIM Card Has Been Installed.
- For configuration information when a SIM card is not present, refer to SIM Card Has Not Been Installed.
SIM Card Has Been Installed
When a SIM card has been installed into the rCell 300, the system enables users to set a PIN code and Access Point Name (APN) for the installed SIM card.
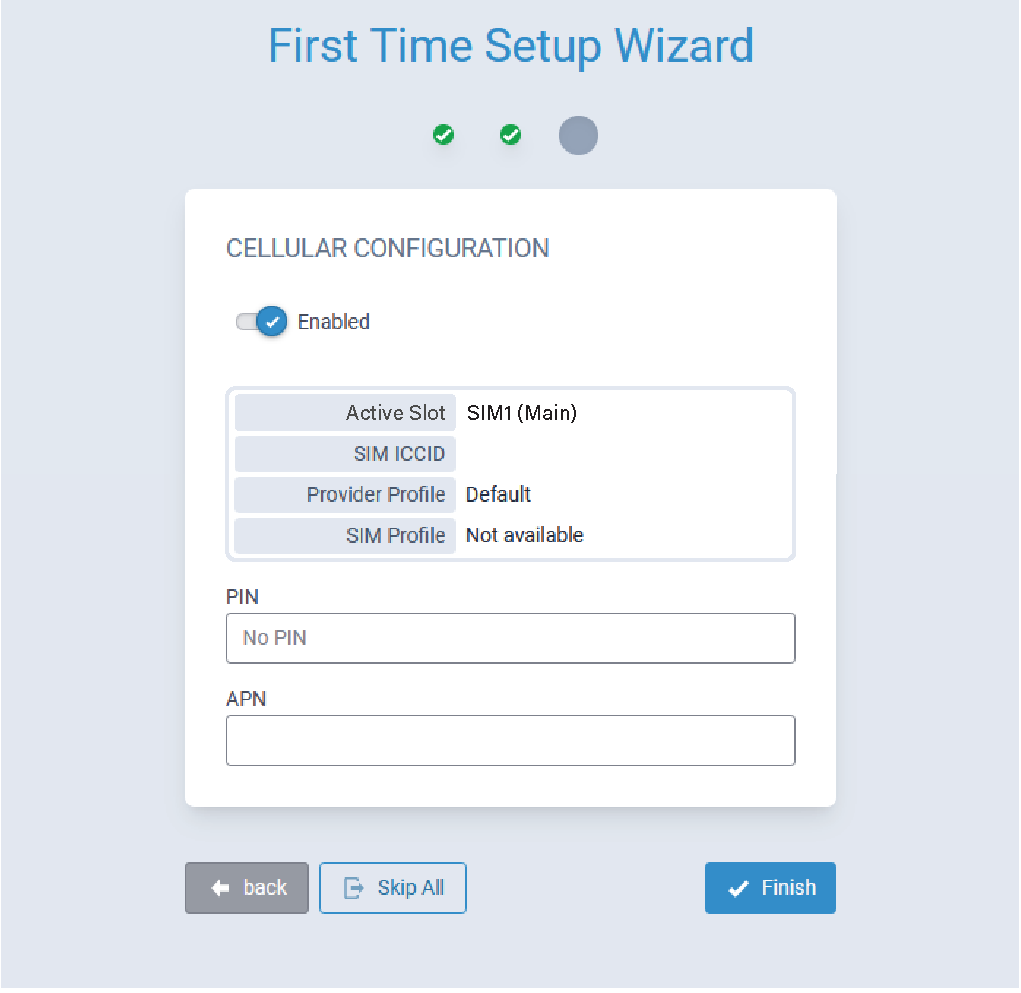
The system will create a corresponding provider profile and SIM profile that are linked to the installed SIM card.
If required, enter appropriate values for the PIN and/or APN and then click Finish to complete the initial configuration of the rCell 300 and exit the First Time Setup Wizard.
SIM Card Has Not Been Installed
If no SIM card has been installed, an error message similar to that shown here is displayed.
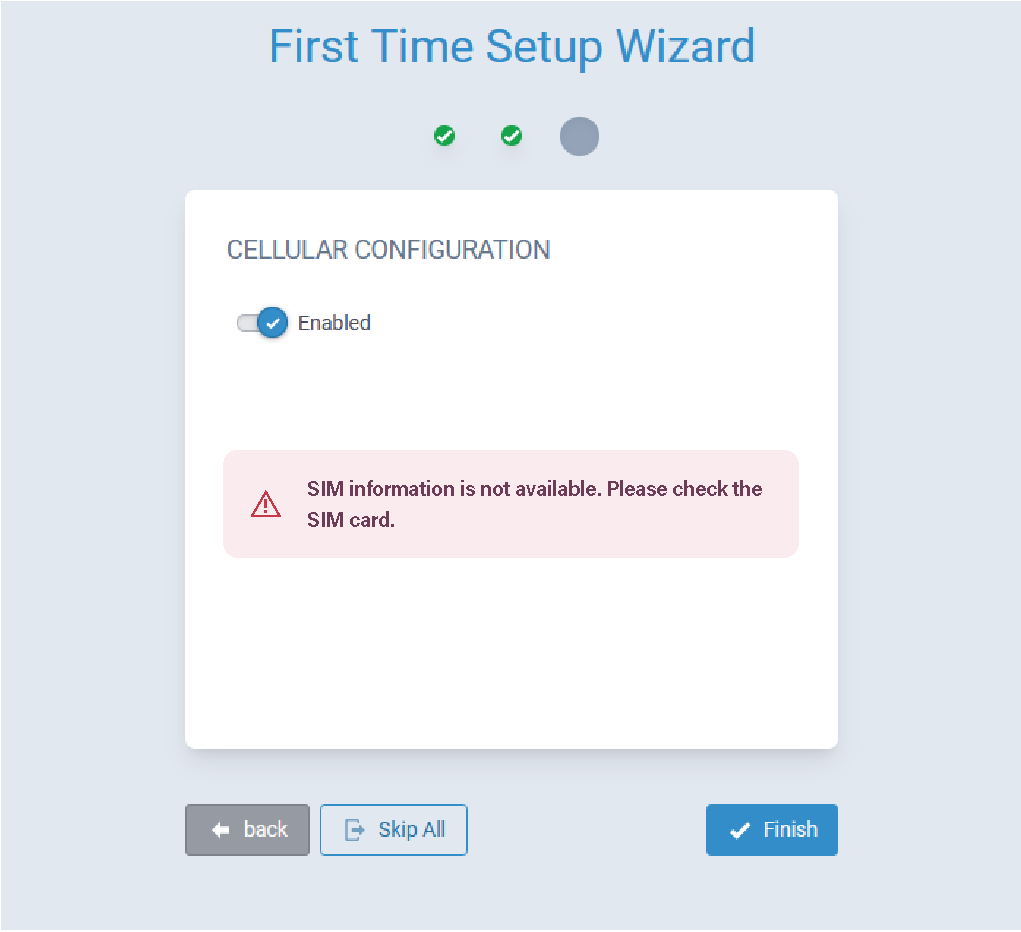
Connect Via Ethernet
- This device has a DHCP server on it, which has a 192.168.2.1 IP address by default.
- When using Ethernet ETH0/LAN port for local configuration, the router assigns connected assets a 192.168.2.x IP address using its built-in DHCP server. When using Ethernet ETH1/WAN port for Internet access, do not connect the router to a network that uses 192.168.2.x IP addresses.
- Connect one end of an Ethernet cable to the ETH1/WAN port on the device (the outermost Ethernet port).
- Connect the other end of the Ethernet cable to your computer (or other device that can reach the internet).

Troubleshoot Connectivity
Depending on your connection method, reference the following troubleshooting sections as needed.
Troubleshoot Cellular Connection
- Verify you connected the power supply correctly and with the proper polarity (the wire with the dashed line is positive)
- Verify you connected both cellular antennas properly.
- Verify you inserted the SIM card properly and in the correct SIM slot that matches the web UI setup (SIM 1 or SIM 2).
- Verify you activated the SIM card and has an active data plan. If not, please contact your SIM provider.
- Ask your SIM provider for an APN, a PIN or a username and password if you need one to connect to a cellular network.
- Verify the cellular signal and network are available at your device setup location.
- Access mPower to check cellular status and perform debugging. Our support team can assist you with this, if needed.
Troubleshooting Ethernet Connection
| Problem | Solution |
|---|---|
| Your device was assigned a 192.168.2.X IP address and it cannot reach the Internet | You’ll need to connect your device to a computer for local configuration. Connect an Ethernet cable to the rCell 300 ETH0/LAN port and your computer. Ensure the computer either uses DHCP-assigned IP address, or static IP address 192.168.2.1 / mask 255.255.255.0 / gateway 192.168.2.1 / DNS 8.8.8.8 & 1.1.1.1. Open your computer browser, go to https://192.168.2.1 and follow on-screen instructions. |
| The Internet LED is not solid green | If the Internet LED is not solid green, it means the device can’t reach the Internet. Please confirm that you can reach the Internet with that setup. |
| 2x pulsing green LEDs | 2x pulsing green LEDs means the device can reach the Internet but it can’t authenticate with MT Cloud Device Manager. Please call support if you need assistance: +1 763-717-5863 |
| Still seeing yellow LEDs | Yellow LEDs means the device is still booting up, which can take up to 5 minutes. Wait for the LEDs turn green. |
| GNSS is flashing green | GNSS will likely flash green (not be steady green). This is normal if you don’t have a GNSS accessory. |
Onboard the Device
Create An MT Cloud Device Manager Account
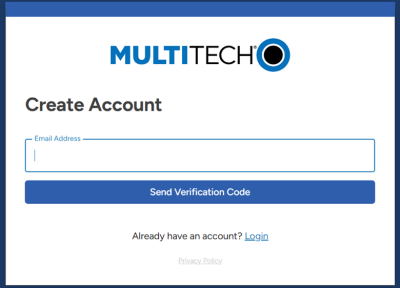
- Go to https://cloud.multitech.com/ in
your browser to start the device onboarding process.Note: If you already have an account, log in to the account using your existing credentials and proceed to Add the Device to Your MT Cloud Device Manager Account. Otherwise, proceed to the next step.

- Select Create account.
- Verify your email address:
- Enter your email address and select Send Verification
Code.Note: MultiTech recommends using your work email so that future shipments can be added to this account automatically.
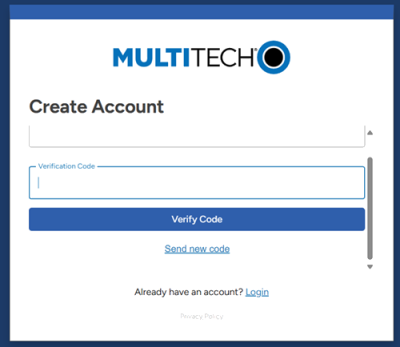
- Check your email for a message from noreply@multitech.com with a
verification code.Note: If you don't see an email, check your junk or spam folder.
- Enter the code in the Verification Code field and
select Verify Code.Note: If you did not receive the code, select Send new code.
- Enter your email address and select Send Verification
Code.
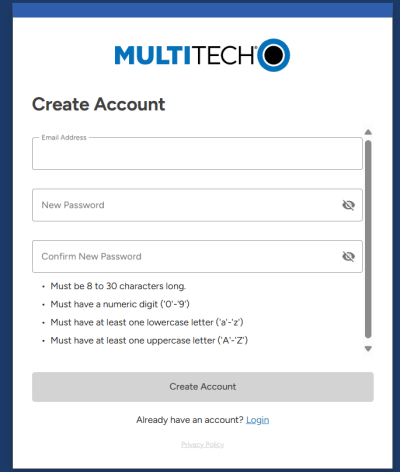
- Enter and confirm a new password, then select Create
Account.
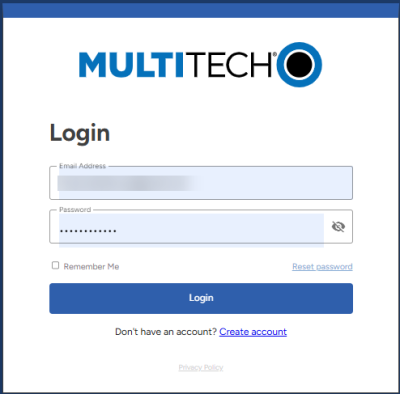
- Enter your credentials and select Login.
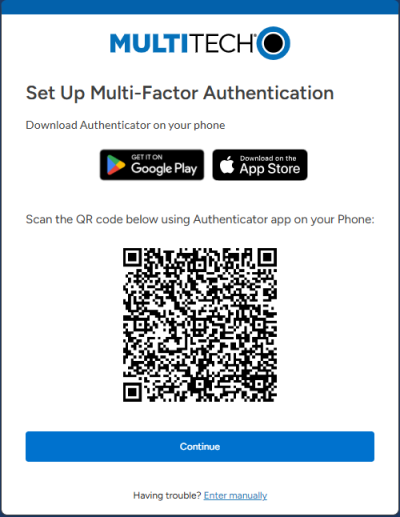
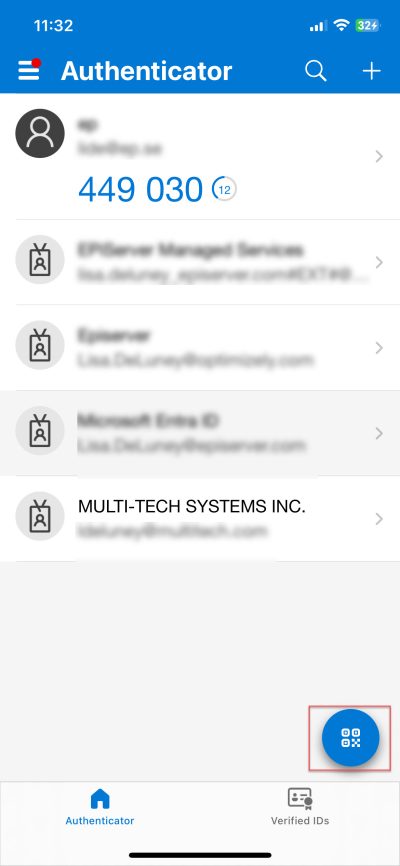
- Set up Multi-Factor Authentication:
- Download the Microsoft Authenticator or Google Authenticator app on your
phone.
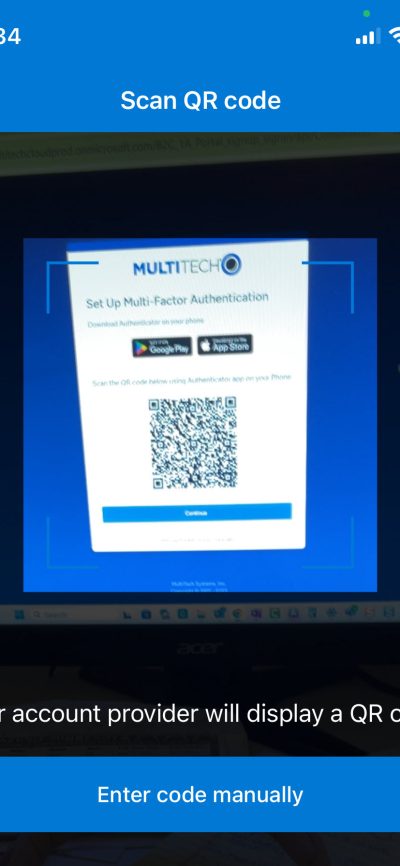
- Open the Authenticator app and select the QR code icon.
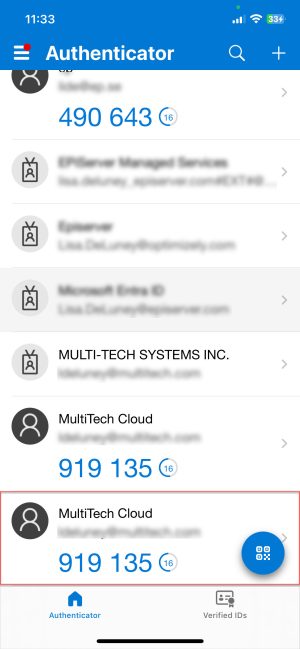
- Scan the QR code.
The MultiTech Cloud account is added to the Authenticator list.
- On the Set Up Multi-Factor Authentication dialog, select Continue.
- Download the Microsoft Authenticator or Google Authenticator app on your
phone.
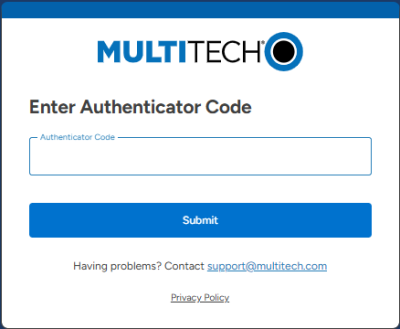
- On the Enter Authenticator Code dialog, enter the Authentication Code for MultiTech
Cloud, then select Submit.
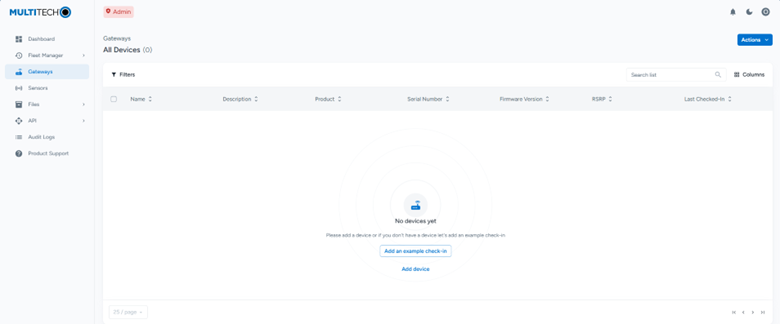
Once you are signed in to your MT Cloud Device Manager account, the Gateways page displays similar to this example image.
Add the Device to Your MT Cloud Device Manager Account
-
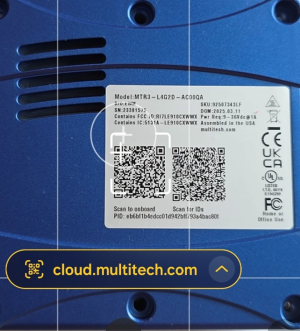
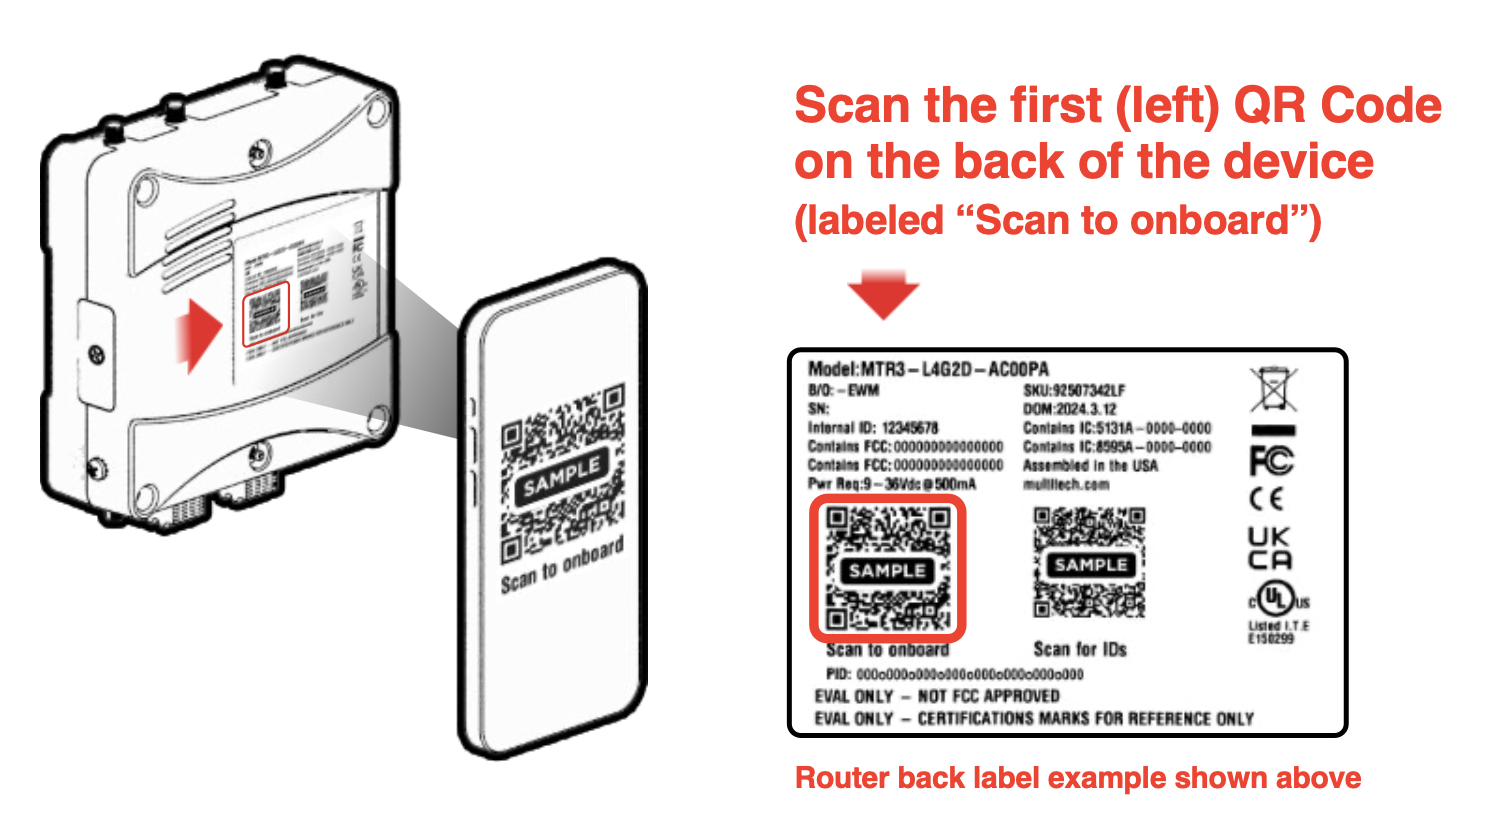
Using a smartphone camera, scan the left QR code captioned Scan to
onboard.


-
Click cloud.multitech.com on your smartphone and follow the instructions to sign
in to your account.
Once you are signed in to your MT Cloud Device Manager account, the system automatically onboards your device. A successfully onboarded rCell 300 displays similar to this example image.
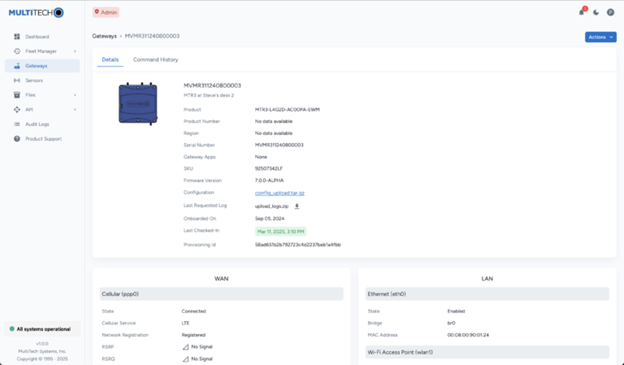
Verify Onboarding
You can verify that your device is onboarded by rebooting the device remotely (if you have only one device) or configuring a device locally and sharing its config file with your device fleet (if you have multiple devices of the same type).
Reboot A Device Remotely
If you only have one device, use these steps to reboot the device remotely.
- Log in to MT Cloud Device Manager and select Gateways.
- On the Gateways page, select your device to open the device details page.
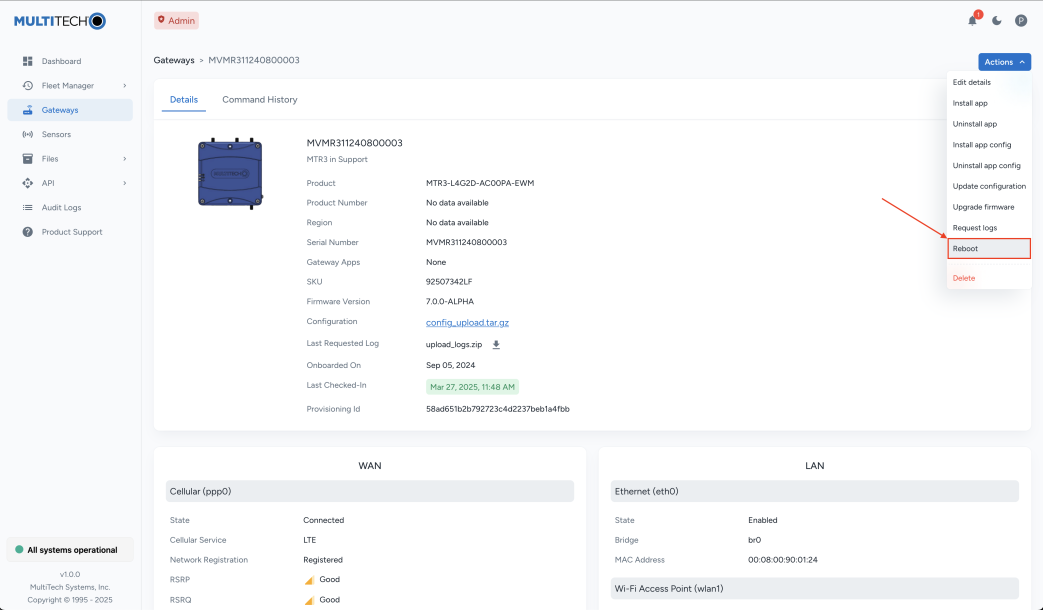
- Select Actions > Reboot.

- The next time the device checks in, MT Cloud Device Manager will deliver the reboot
command.Note: By default, the check-in interval is four hours. You can wait for the device to check in or speed up the process by power cycling it. To power cycle the device, remove the power cable for three seconds, then plug it back in.
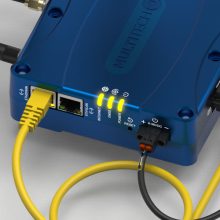
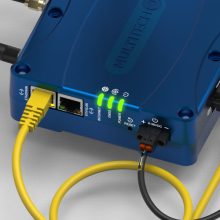
- Verify that the device's LEDs turn yellow as the device goes through
the remote reboot and check-in process.

- Wait for the Internet and Power LEDs to be steady
green. It could take up to five minutes for the device to boot up and check in with
MT Cloud Device Manager again.
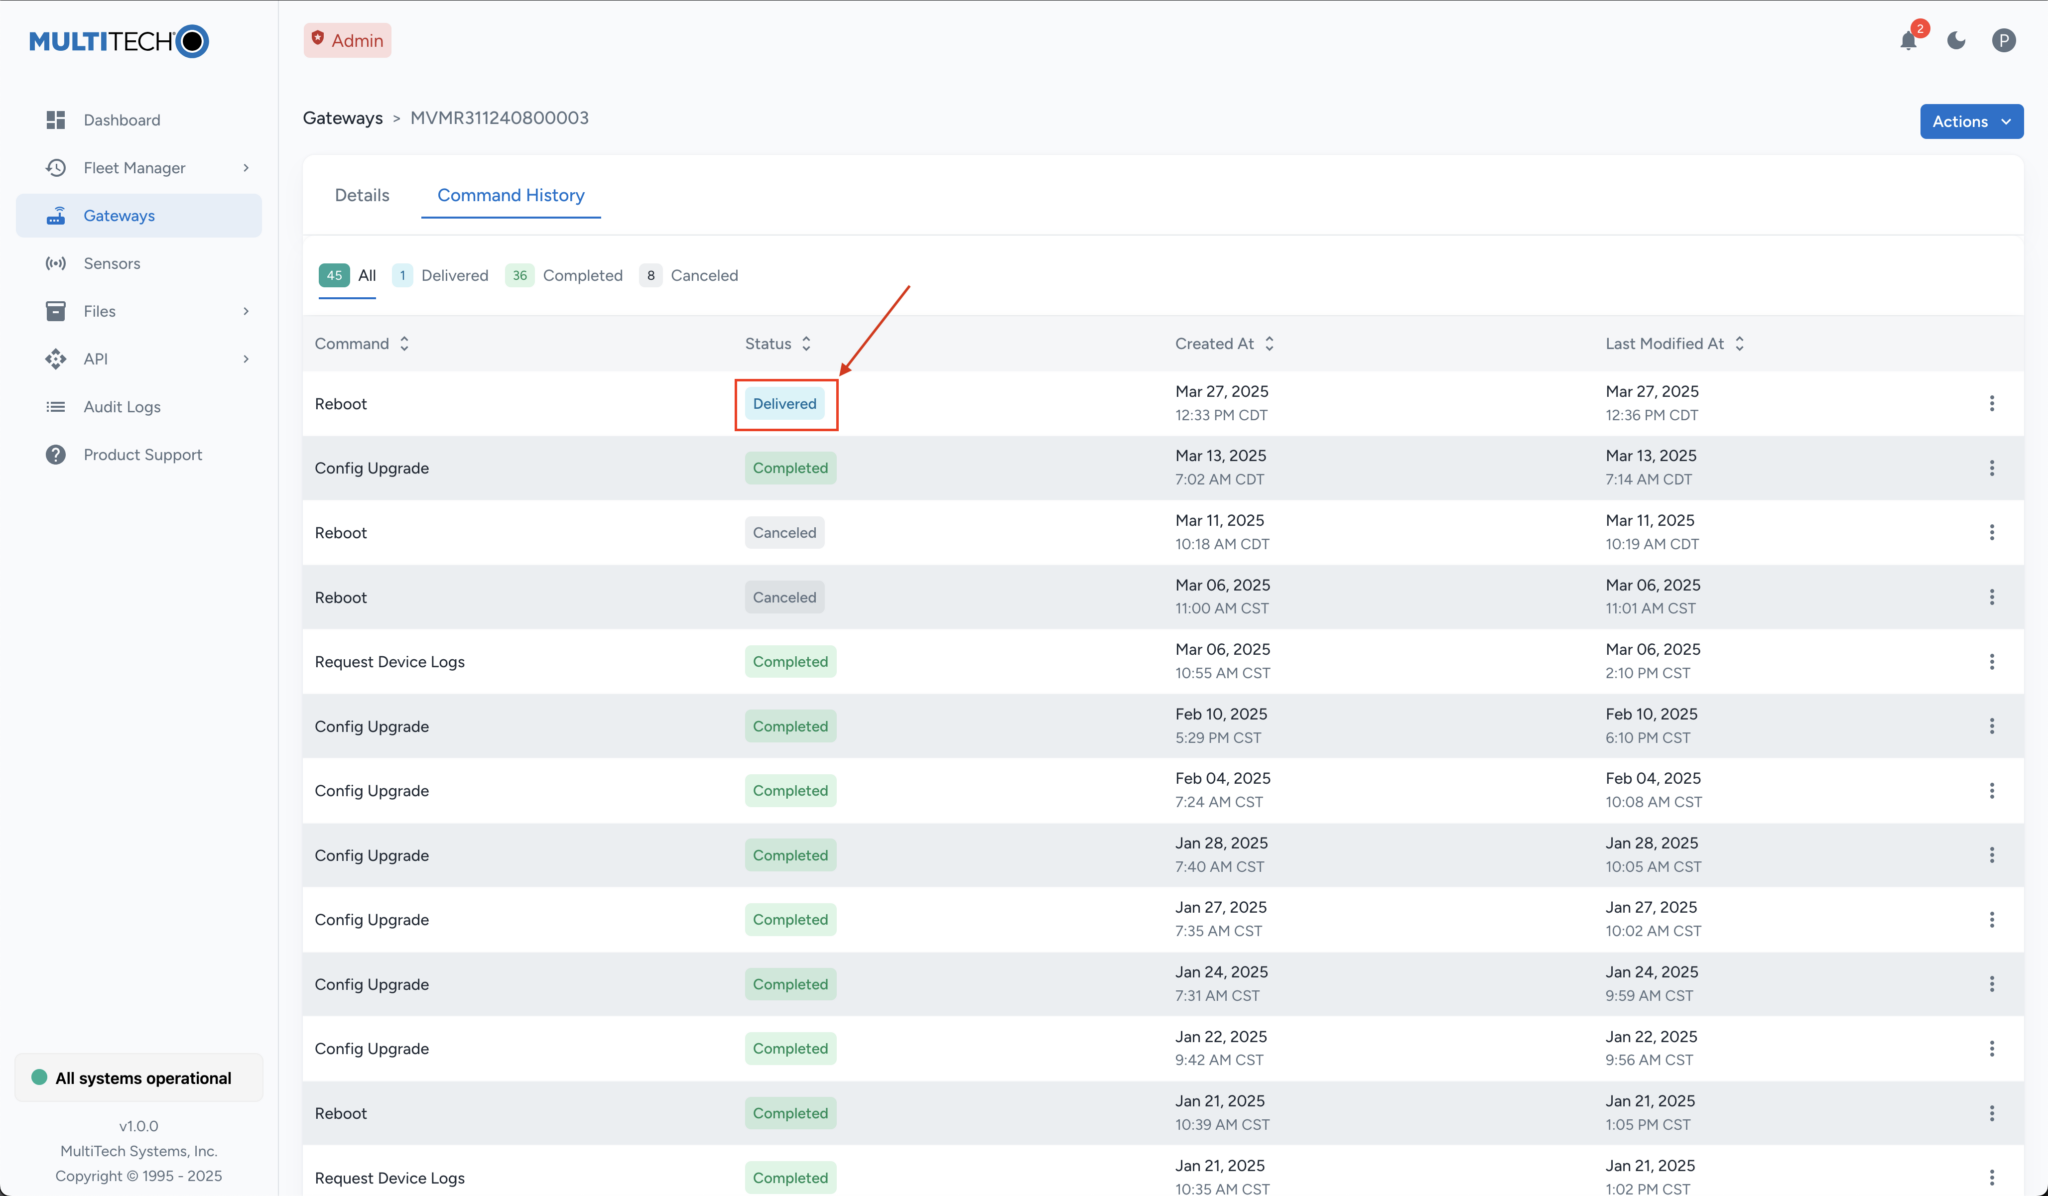
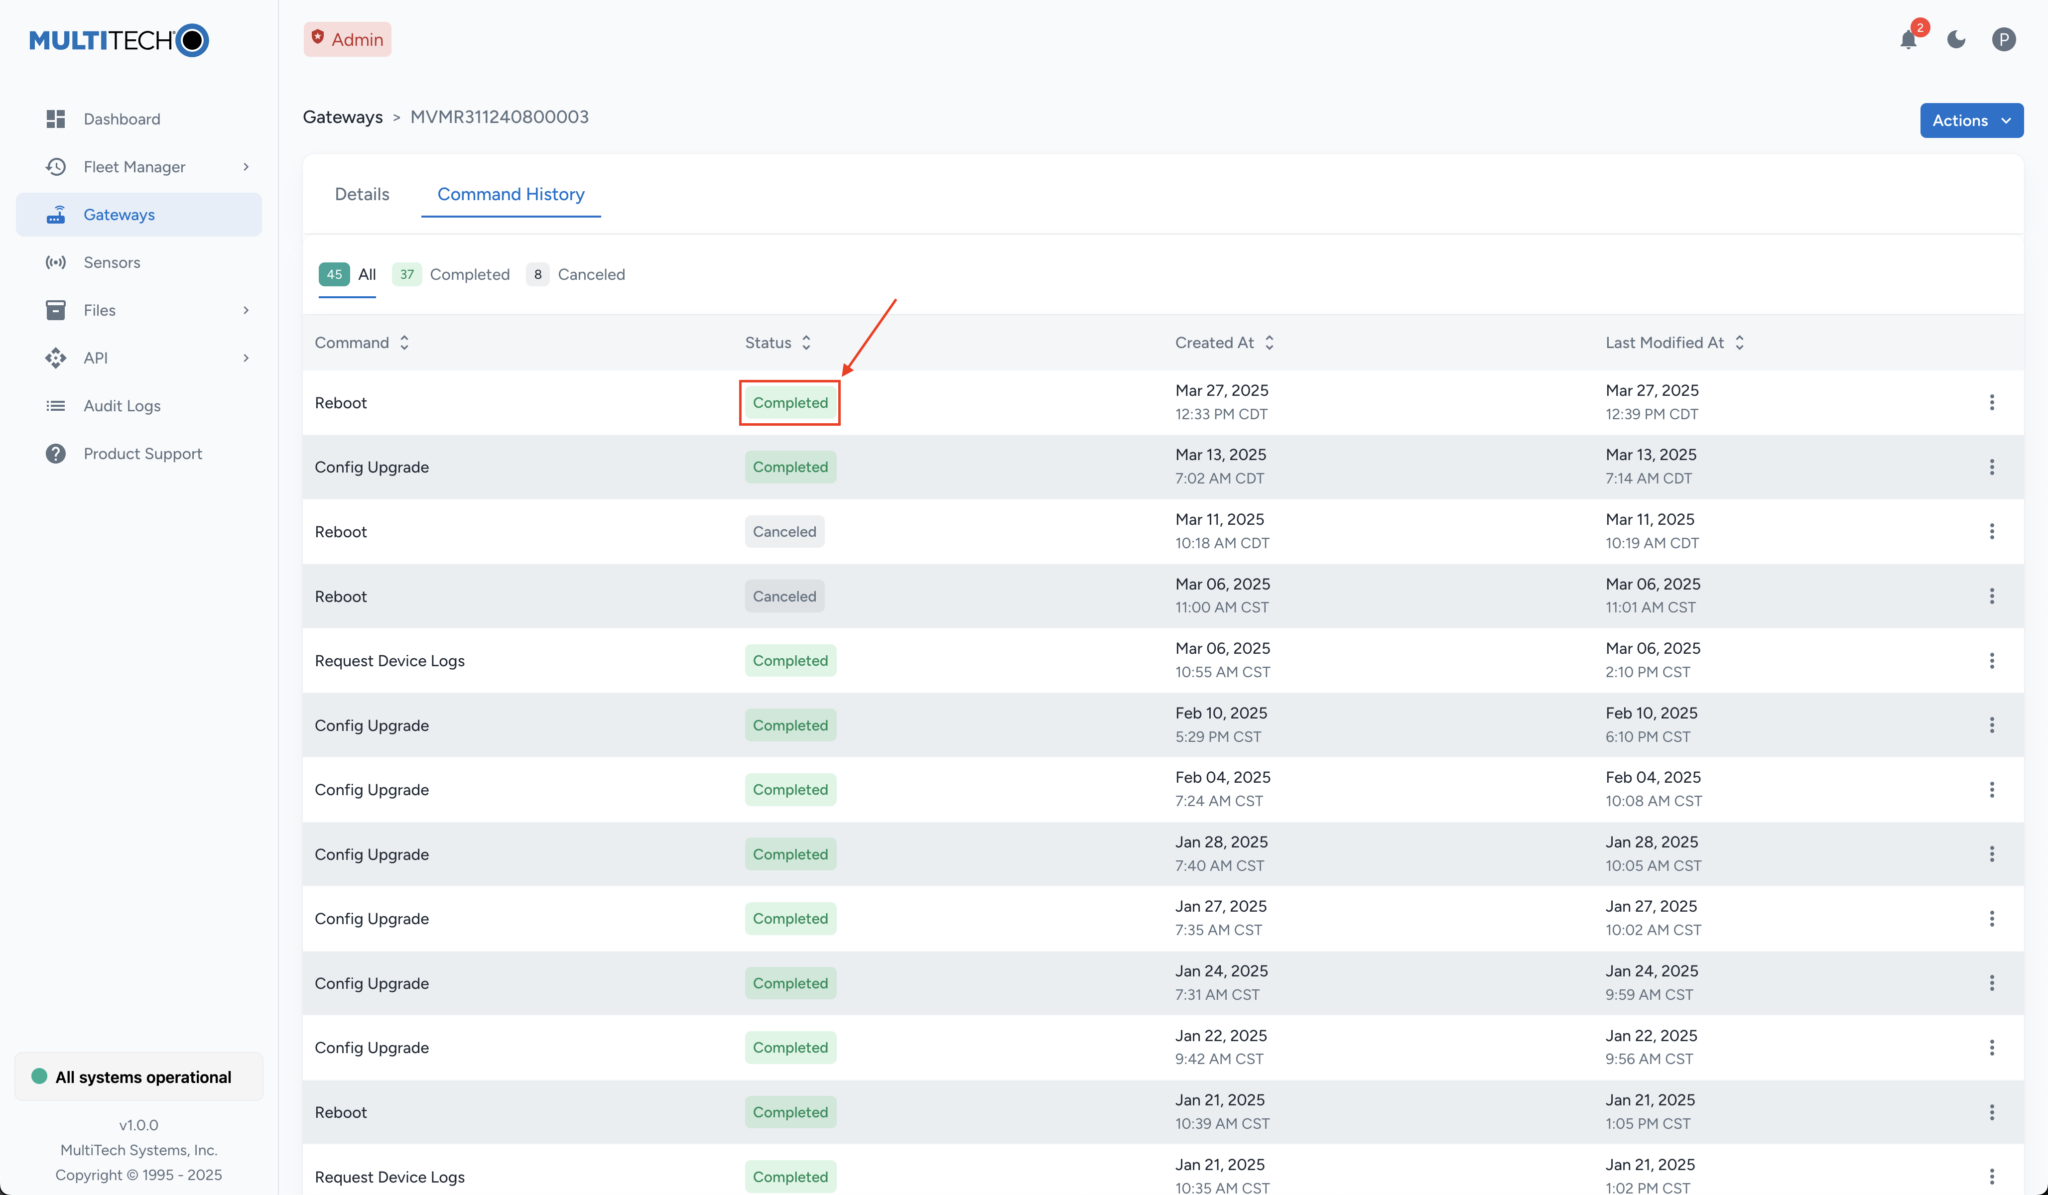
- Log in to MT Cloud Device Manager and confirm the status of the reboot command
status is Completed.
Configure A Device Locally and Share Config Files with Device Fleets
If you have multiple devices of the same type, use these steps to configure one device locally then share its config file with your device fleet.
- Power up your device and access it directly through the LAN interface at
192.168.2.1. Make a configuration change, for example to enable WiFi and set its
SSID.Note: The LAN interface has a DHCP server running on it to provide addresses in the range of 192.168.2.100 – 192.168.2.254, netmask 255.255.255.0. Review the documentation for the following menus for more on the settings and parameters you can update:
- Select Submit and then select Save & Apply.
- Save the device’s config file to your computer.
- Log in to MT Cloud Device Manager and select Files > Configurations
- To add the configuration file you want to apply to a fleet of devices, select Actions > Upload file.
- Select Gateways and select the checkboxes next to the devices you want to use the new configuration file.
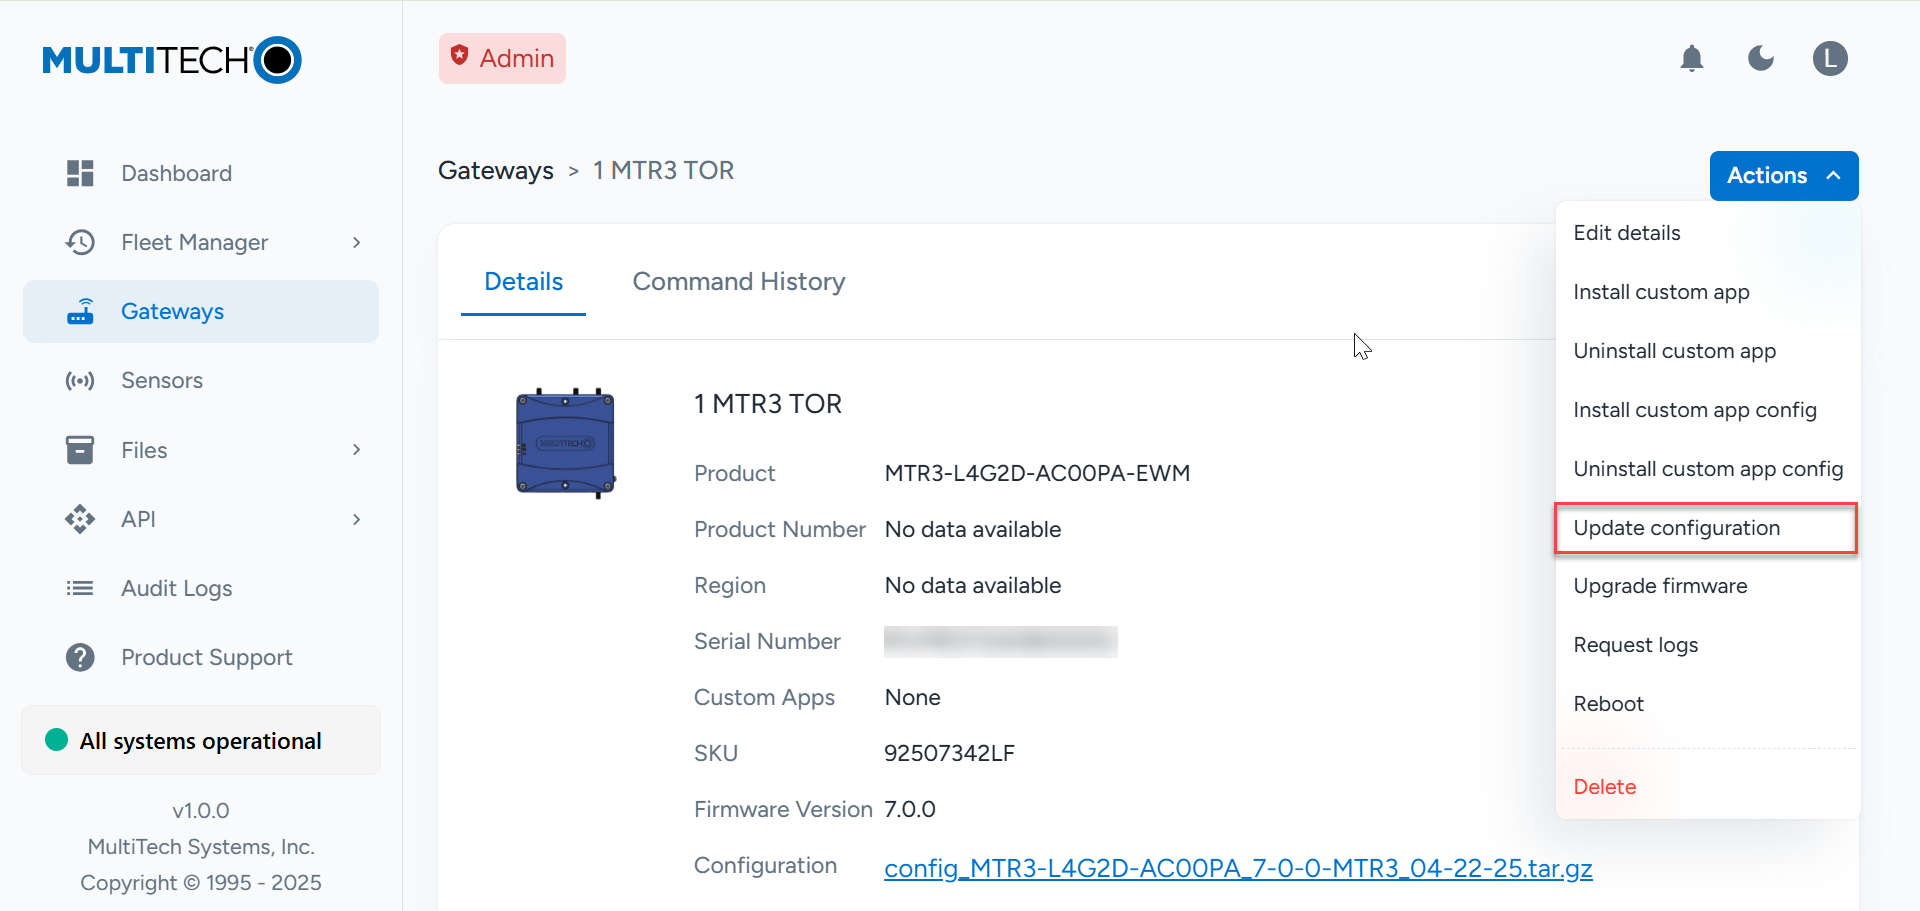
- Select Actions > Update
configuration.
- Select the Compatible Product and Configuration File to apply to the selected devices, then select Update Devices.
- The next time the devices check in, MT Cloud Device Manager will deliver the config
upgrade command.Note: By default, the check-in interval is four hours. You can wait for the device to check in or speed up the process by power cycling it. To power cycle the device, remove the power cable for three seconds, then plug it back in.
- Log in to MT Cloud Device Manager and confirm the status of the config upgrade command is Completed, then verify that the new configuration appears for the selected devices in your fleet.
Contact Support
Now that we’ve connected your device and sent it an example command via MT Cloud Device Manager, contact support for further assistance or to offer feedback on this process.
Other Documents
Additional documentation for the rCell 300 is available at https://multitech.com/rcell-300-series/#documents.