Step 2/4: Connect Device
Connect rCell 300 to the Internet
Powering your device
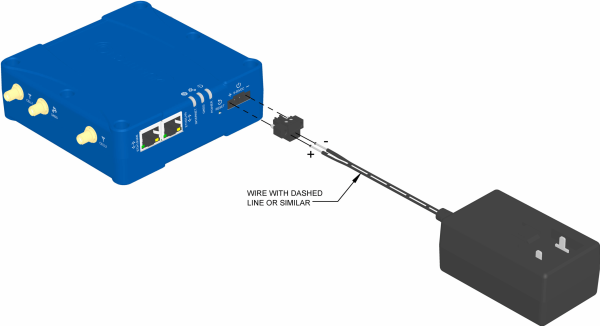
Connect the power supply to your rCell 300:
- Using a 2.0 mm slotted screwdriver, screw the power supply wires into the 2-wire terminal plug.
- Secure the 2-wire terminal plug to the 9–36 VDC 2-pin terminal block on the device using a 2.5 mm slotted screwdriver.
- Connect the power supply to a power source. The POWER LED turns solid green when the device is ready for use.
The proper polarity is is to match the wire with a dashed line to the positive and the black wire to the negative. Be careful to prevent any potential reverse polarity connections.
To connect the rCell 300 over cellular to Device Manager:
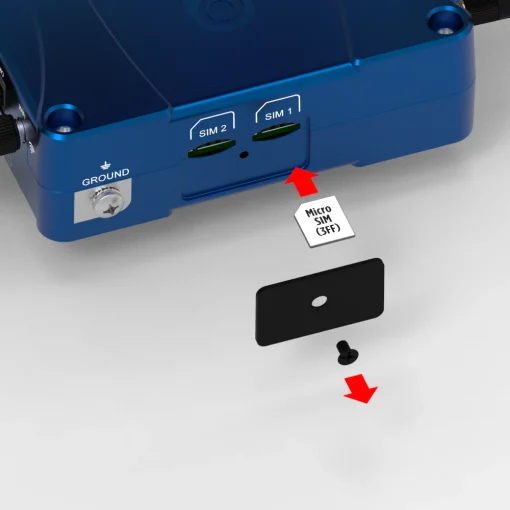
1. Install the SIM card to operate the device on a wireless network.
Remove the cover plate with a #1 Phillips screwdriver to access the dual SIM ports. Insert an active Micro SIM 3FF card into SIM 1. Replace the cover plate.
2. Connect to the device locally via Ethernet to enable the SIM ports.
Plug one end of an Ethernet cable into the ETH0/LAN port on the rCell 300 and the other end into your computer’s Ethernet port.
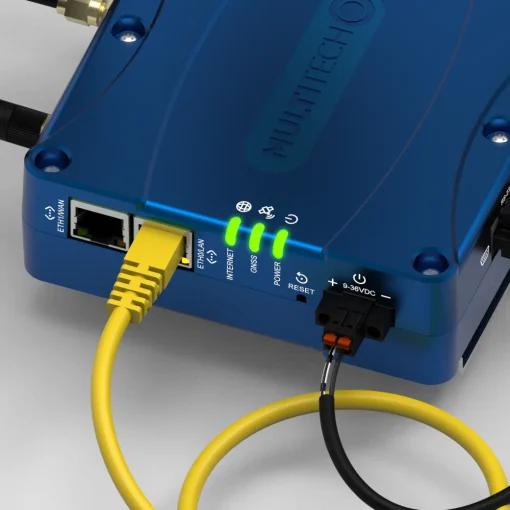
3. Log in to the device using your browser.
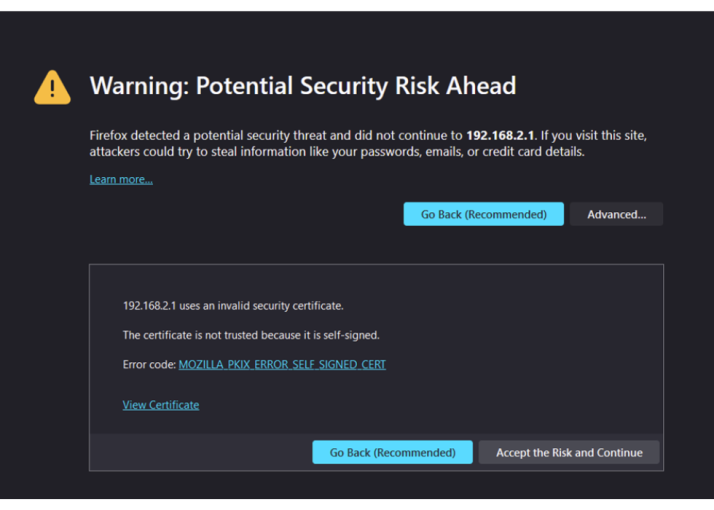
Enter the default LAN port IP address into your browser, which is typically 192.168.2.1 (https://192.168.2.1), but yours may differ depending on your setup.
Click Advanced and Accept the Risk and Continue to access the site.
4. Create an account to commission the device and enable it to connect to a wide-area network.
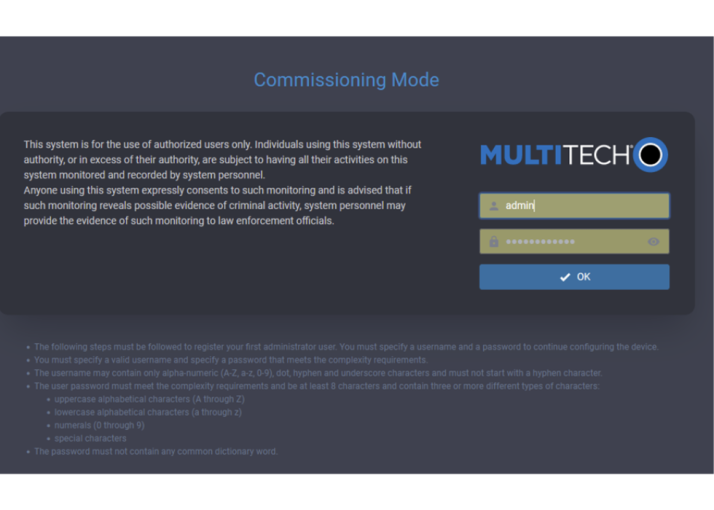
The site launches in Commissioning Mode. Enter a username and password for the site and click OK.
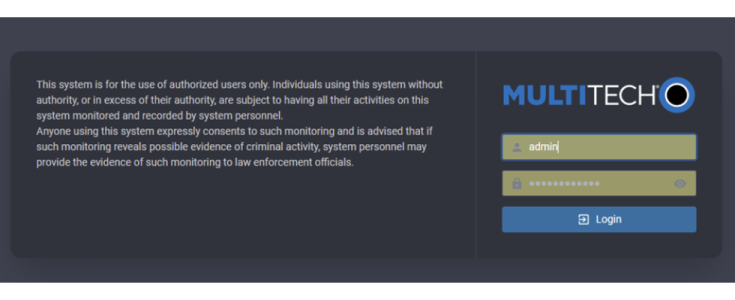
Enter the credentials you created and click Login to log into the site and launch the First Time Setup Wizard.
5. Complete the First Time Setup Wizard.
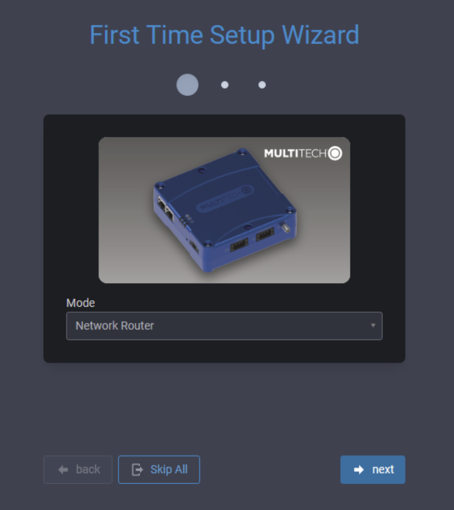
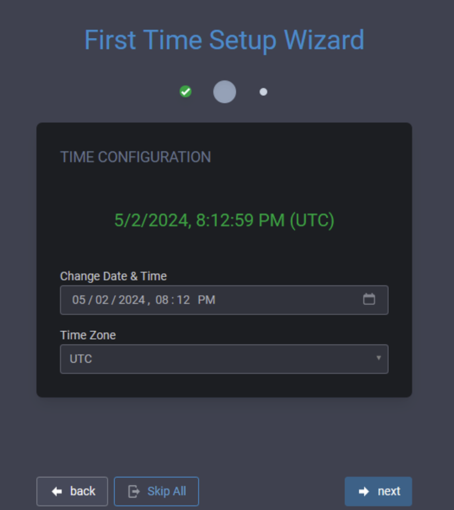
Select Network Router from the Mode drop-down list and click next if the values in the Change Date & Time and Time Zone fields are accurate.
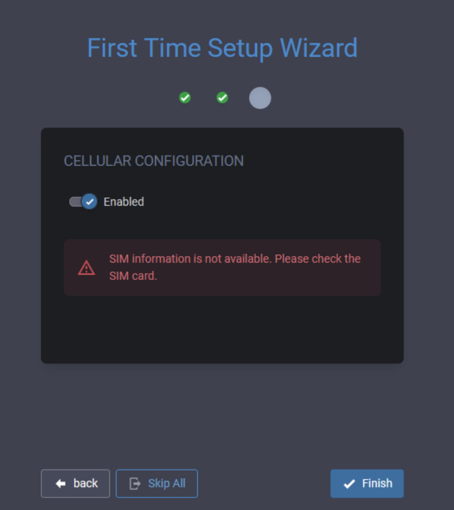
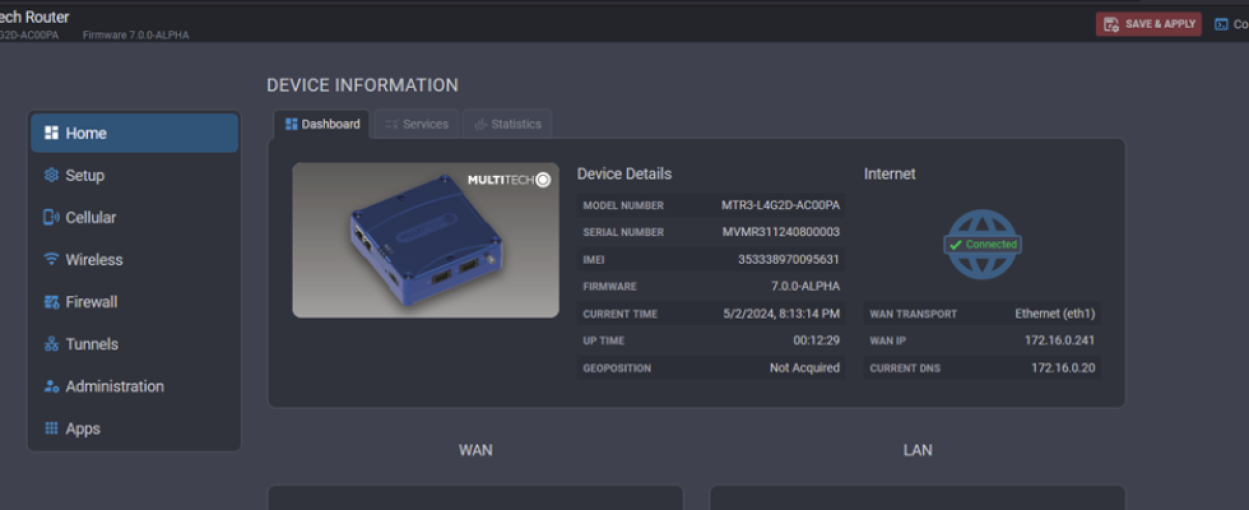
Move the Cellular Configuration slider to Enabled to turn on cellular connection and click Finish. The mPower Dashboard for the device appears.
Click Save & Apply on the top menu bar.
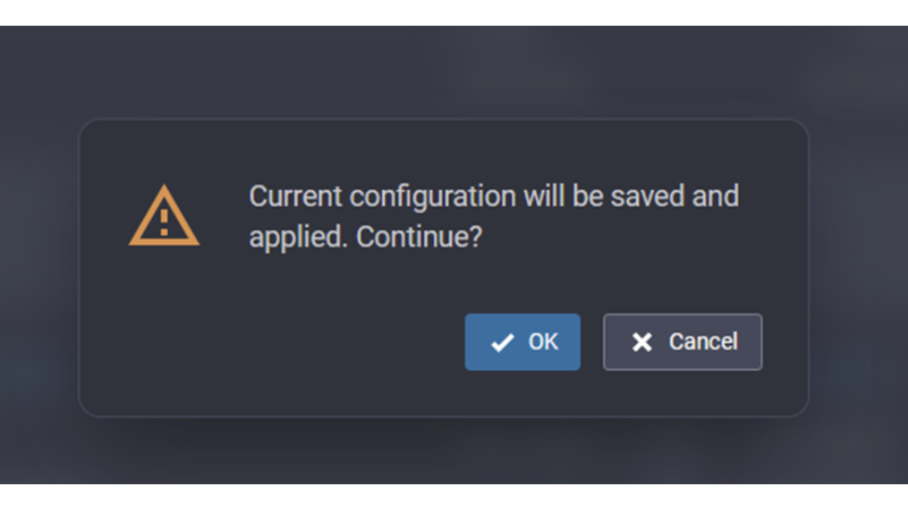
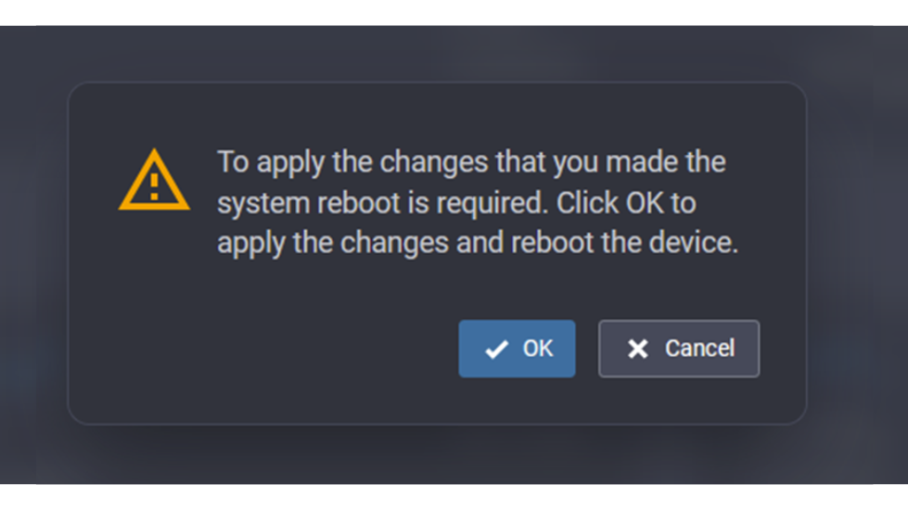
Click OK to save and apply the configuration change. Click OK again to apply the changes and reboot the device. Rebooting a device may take multiple minutes.
Note: If your cellular provider provides an APN and doesn’t require a PIN, your rCell 300 should automatically check in to MultiTech Device Manager.
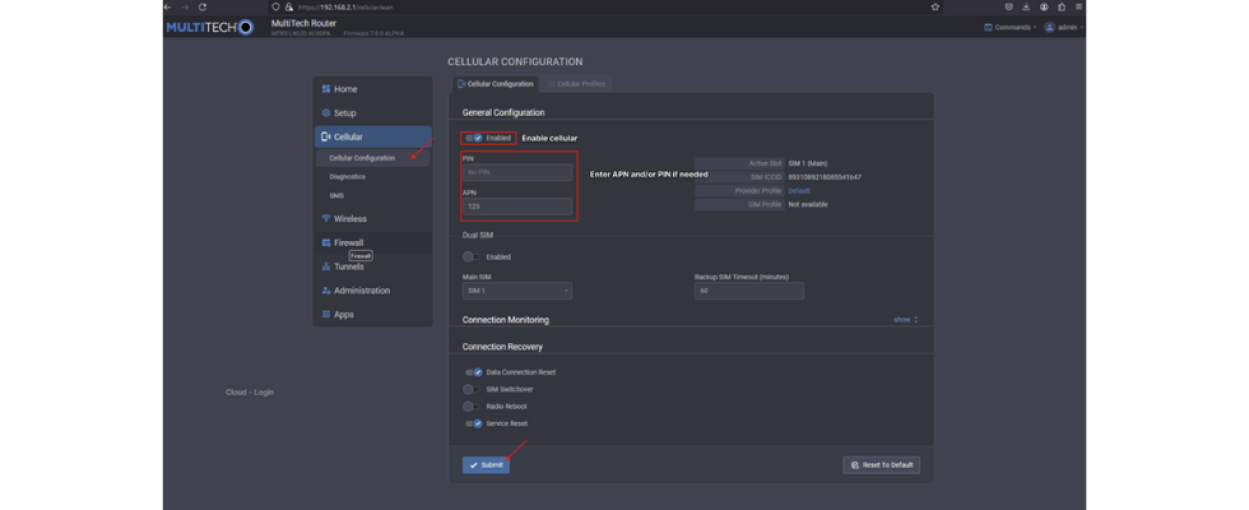
If you clicked Skip All to exit the First Time Setup Wizard or your cellular provider requires an APN or PIN, select the Cellular > Cellular Configuration option to add them.
Troubleshooting
- Verify you connected the power supply correctly and with the proper polarity (the wire with the dashed line is positive)
- Verify you connected both cellular antennas properly.
- Verify you inserted the SIM card properly and in the correct SIM slot that matches the web UI setup (SIM 1 or SIM 2).
- Verify you activated the SIM card and has an active data plan. If not, please contact your SIM provider.
- Ask your SIM provider for an APN, a PIN or a username and password if you need one to connect to a cellular network.
- Verify the cellular signal and network are available at your device setup location.
- Access mPower to check cellular status and perform debugging. Our support team can assist you with this, if needed.
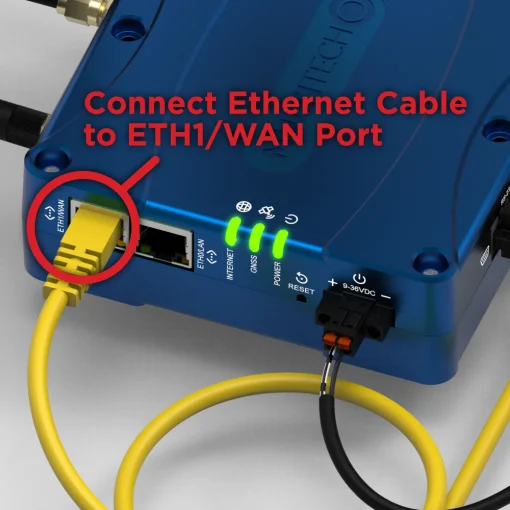
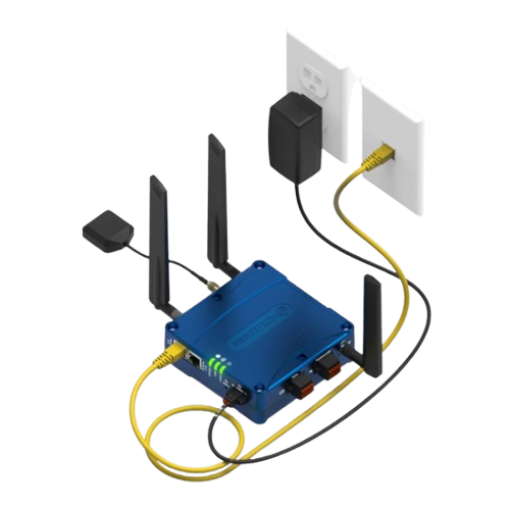
1. Connect one end of an Ethernet cable to the ETH1/WAN port on the rCell 300 (the outermost Ethernet port).
2. Connect the other end of the Ethernet cable to your computer (or other device that can reach the internet).
Troubleshooting
You’ll need to connect your device to a computer for local configuration. Connect an Ethernet cable to the rCell 300 ETH0/LAN port and your computer. Ensure the computer either uses DHCP-assigned IP address, or static IP address 192.168.2.1 / mask 255.255.255.0 / gateway 192.168.2.1 / DNS 8.8.8.8 & 1.1.1.1. Open your computer browser, go to https://192.168.2.1 and follow on-screen instructions.
If the Internet LED is not solid green, it means the device can’t reach the Internet. Please confirm that you can reach the Internet with that setup.
2x pulsing green LEDs means the device can reach the Internet but it can’t authenticate with MultiTech Device Manager. Please call support if you need assistance: +1 763-717-5863
Yellow LEDs means the device is still booting up, which takes up to 5 min. Please wait until LEDs turn green.
GNSS will likely flash green (not be steady green). This is normal if you don’t have a GNSS accessory.
Verify internet access and check-in status
Once your rCell 300 has internet access, as indicated by steady green LEDs for Internet and Power, the device automatically checks into Device Manager. The check-in process could take up to five minutes to complete.
Note: If you are not using a GNSS antenna, the LED for Location will be flashing green.
Contact Support
Mon – Fri from 8am to 5pm CST support@multitech.com